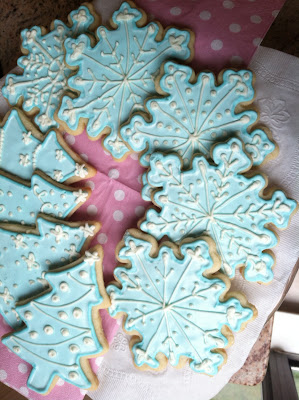
The last time I tried to make sugar cookies I basically blew it. The task was Minnie Mouse cookies, but I promised my husband's little brother that I would make them eggless (food allergies). Well as it turned it out, they weren't actually eggless because of the meringue powder I used in the frosting (i definitely had a 'DUH!' moment), and they turned everyones teeth black. My hand may have slipped a little on the gel coloring...oops...
Anyway I felt the need to make these cookies especially pretty and delicate looking to make up for the Minnie cookie incident.
Here is what you'll need:
- Sugar Cookie Mix (or Sugar Cookie Recipe)
- 1 Egg
- 1/2 cup Butter, Melted
- 1 tablespoon all-purpose flour
- 1 can vanilla frosting
- Neon blue food coloring
Directions:
- Preheat the oven to 375 degrees. In a medium bowl, combine all of the ingredients until a dough forms.
- On a floured surface, roll out dough until it is approximately 1/4 inch thick.
- Using any kind of cookie cutter to make shapes. (I used snowflakes, trees, and stars)
- Bake for 8 minutes (This really depends on how you like your cookies, I like them soft in the middle. If you like them sort of crunchy bake them longer.) Let them cool completely.
5. In a stand mixer with a whisk attachment, whip frosting for 4 minutes. This will add more air and increase the amount of frosting.
6. In a separate bowl with about half the frosting, add 1 TINY drop of neon blue food coloring, mix.
7. Using a # Tip pipe the outline of the cookies. Allow the outline to set for several minutes before
filing.
8. Add 1 tsp. of water at a time, to the blue frosting until you get a consistency like honey, or shampoo. Using a decorating bottle, fill the cookies. Pop any air bubbles with a toothpick!
9. Let the cookies set overnight! Keep the white frosting in a bowl covered with a damp paper towel in the fridge. Make sure you let the frosting come to room temp before piping.
10. Using a # Tip pipe different designs on your cookies, or the same one if you're not feeling so creative. Let them set, or enjoy =)
Here is how mine turned out. As you'll notice none of the stars made it to the final round of decorating...


No comments:
Post a Comment